Garmin Fenix 6 & 7 navigation: how to easily load a GPX file
Step-by-step instructions for exporting a GPX track from Gaia GPS or CalTopo and importing it into Garmin Connect. Sync your Fenix and you can start navigating!


The Garmin Fenix 6 and Fenix 7 are fantastic GPS sports watches. But as I mentioned in my Fenix 6 vs. Suunto 9 review, the software isn’t always the most intuitive.
The course navigation feature in the Garmin is really helpful, but it took me a long time to figure out it even existed.

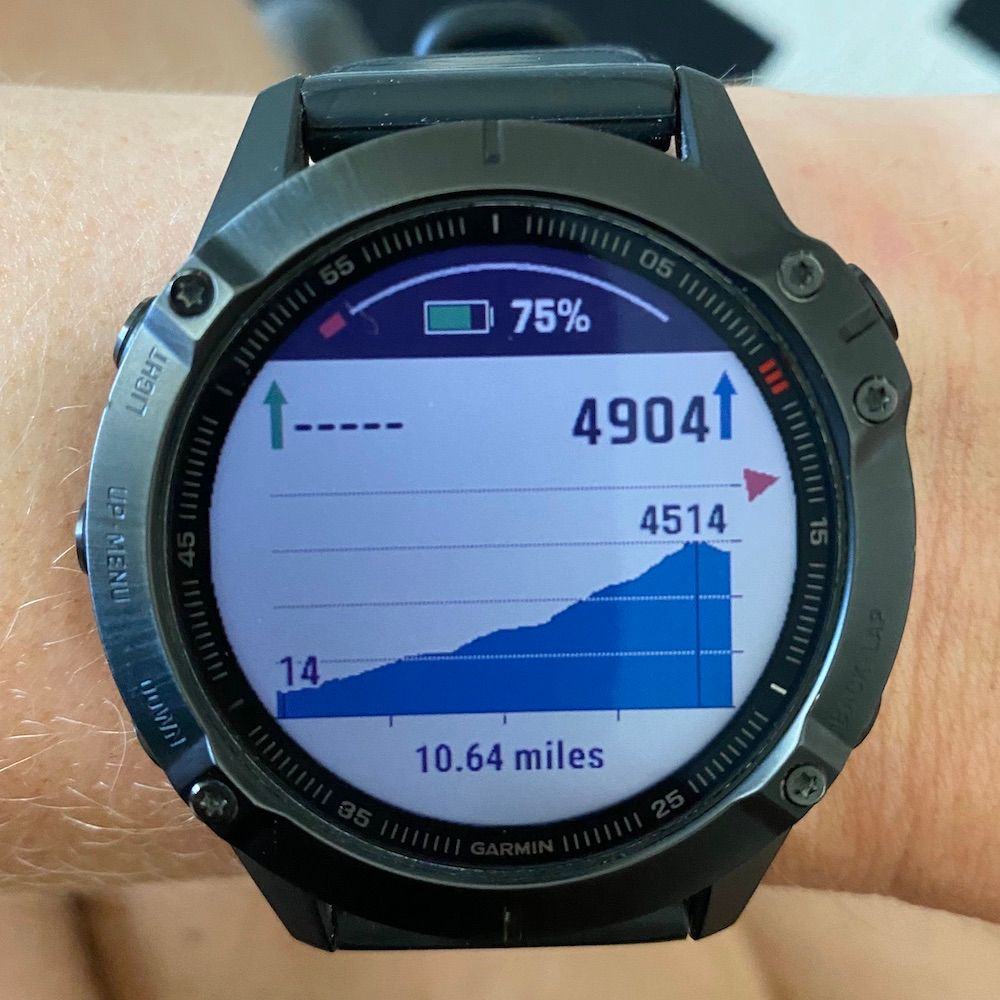
In short, the course navigation feature allows you to load a track while you record an activity. When you have the feature active, it will show you your remaining course profile: distance and elevation map. It will also overlay a red direction arrow on each activity screen that shows you where to go.
But the benefit I find most useful when using the course navigation is that it will let you know if you get too far off course without you having to continually look at your GPS. This has turned out useful in situations like my early season trip to Desolation Wilderness. The trail was difficult to follow in the dense forest under several feet of snow.
Exporting a route as a GPX file
The first step for using the course navigation feature on Fenix 6 is to find or create a track. Below, I’ll show you how to do it with the two apps I use for planning trips: CalTopo and Gaia GPS. For any other apps, search Google for how to export a GPX track.
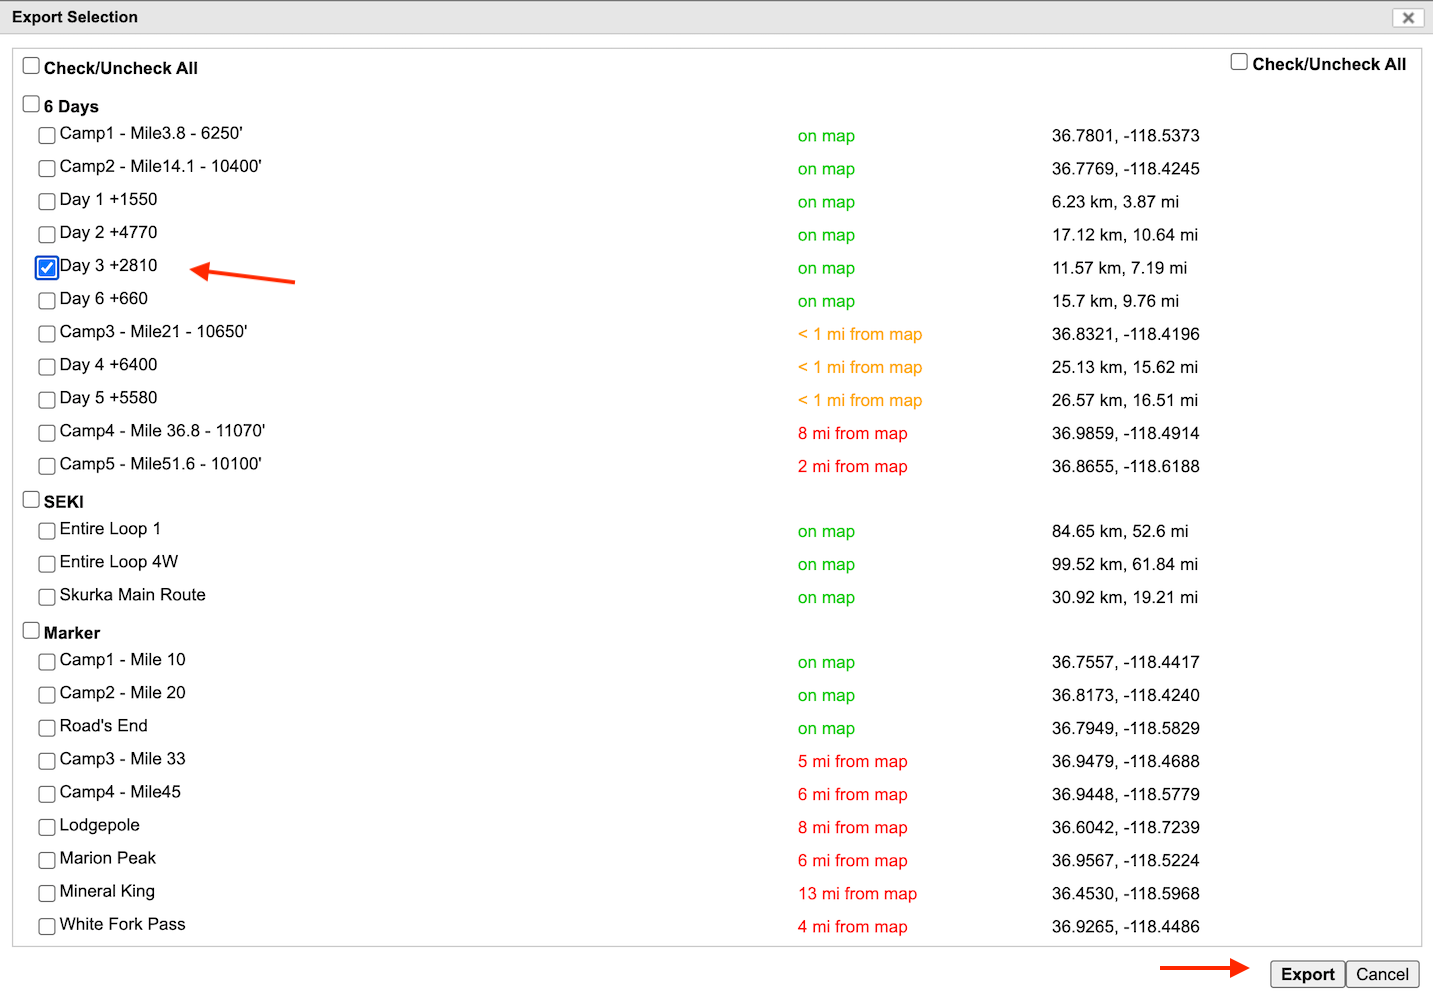
Note: Even if you plan several days in one map, be sure to export them separately, one route per GPX file. Garmin Connect does not support loading GPX files with several tracks.
Exporting a GPX from CalTopo or Gaia on desktop
I find it easier to plan trips on the big screen of a computer. Here are instructions for exporting the routes you’ve created in either CalTopo or Gaia and downloading them to your computer for the next step.
CalTopo GPX export
Select Export > GPX from the top menu.
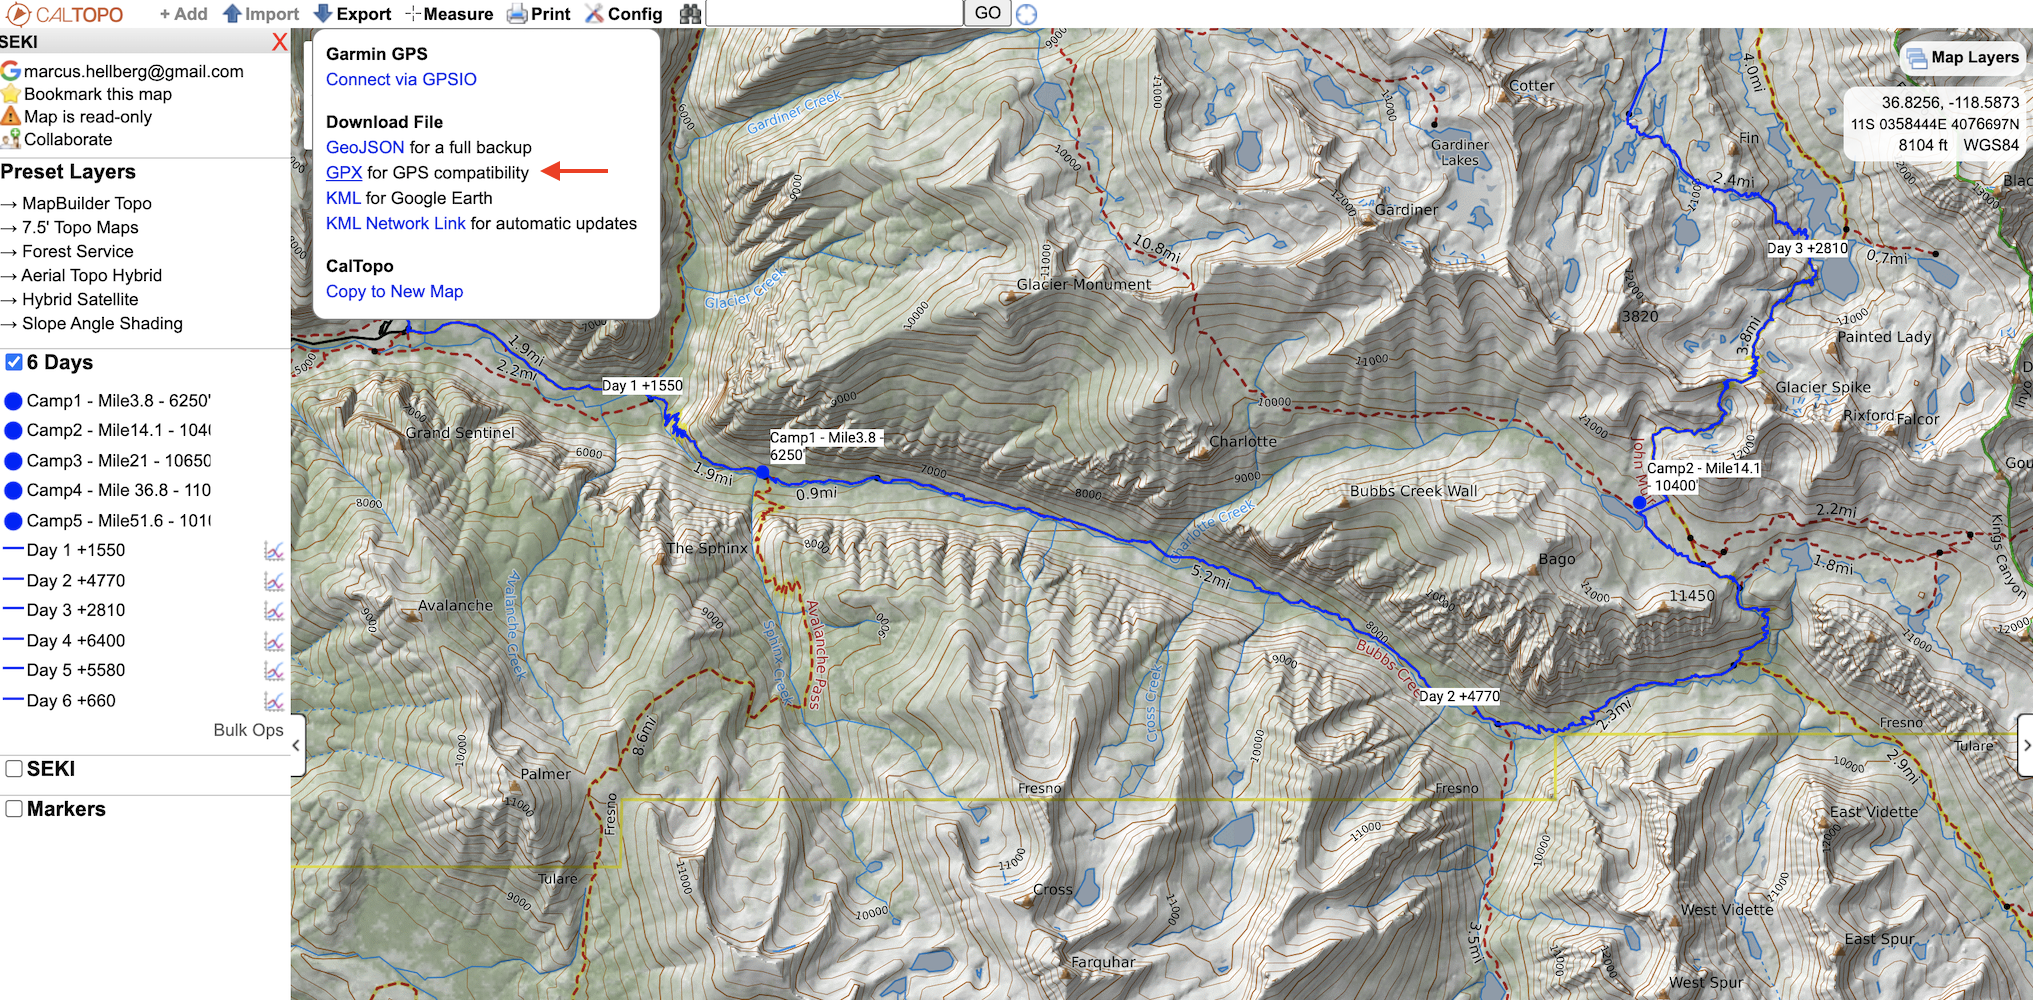
In the export window, select a single day at a time, then click Export. Name the download something you will remember in the next step.
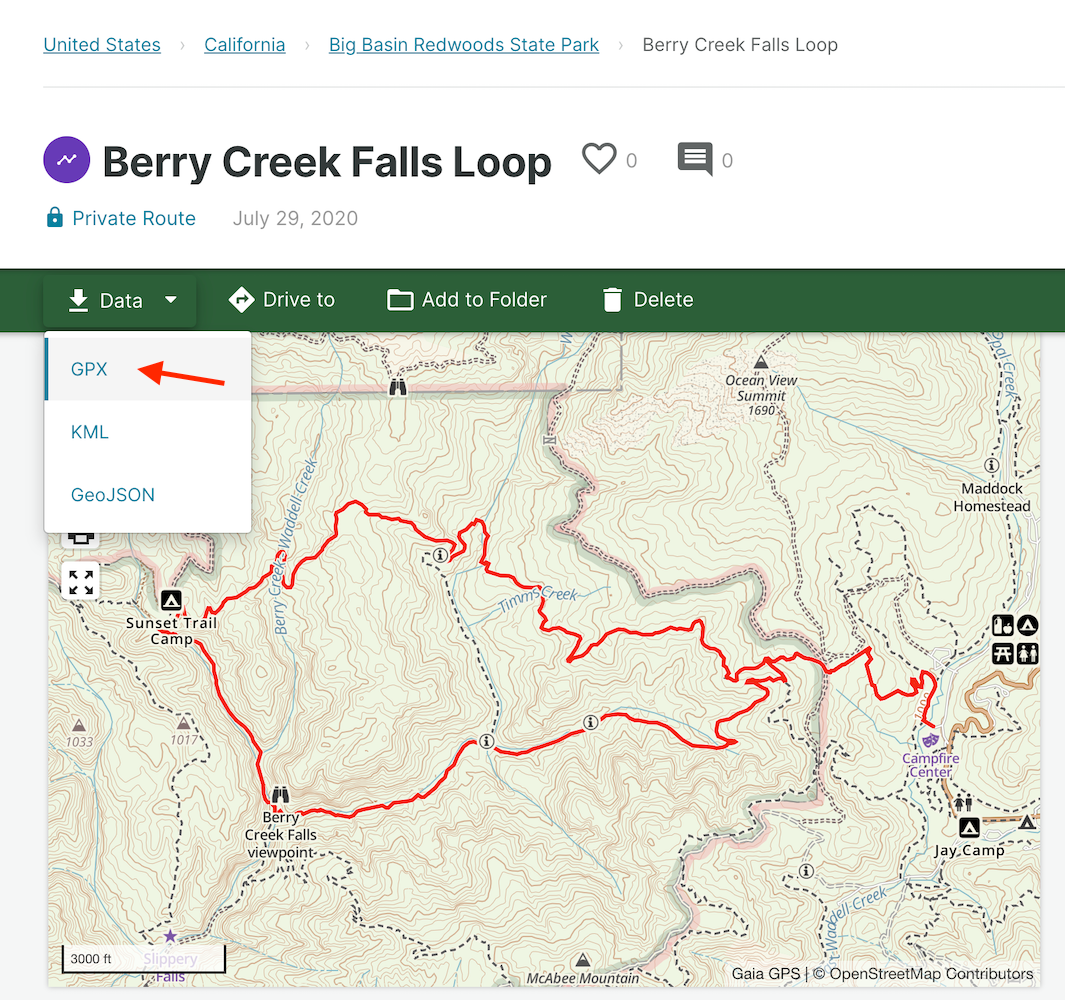
Gaia GPX export
Navigate to the route details page. From the Data dropdown menu, select the GPX option to download the track.
Exporting a GPX from Gaia on mobile
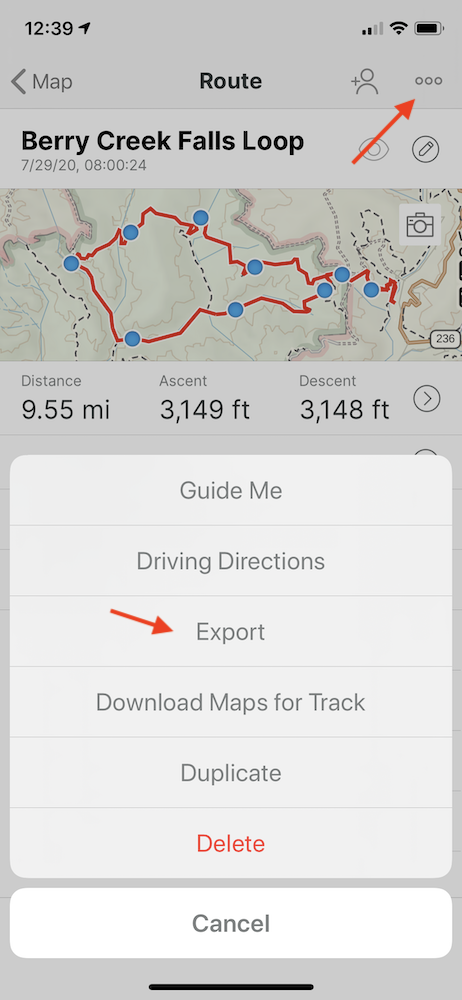
These instructions are for the iPhone application, but they should be similar enough for Android. Let me know in the comments if you have any trouble.
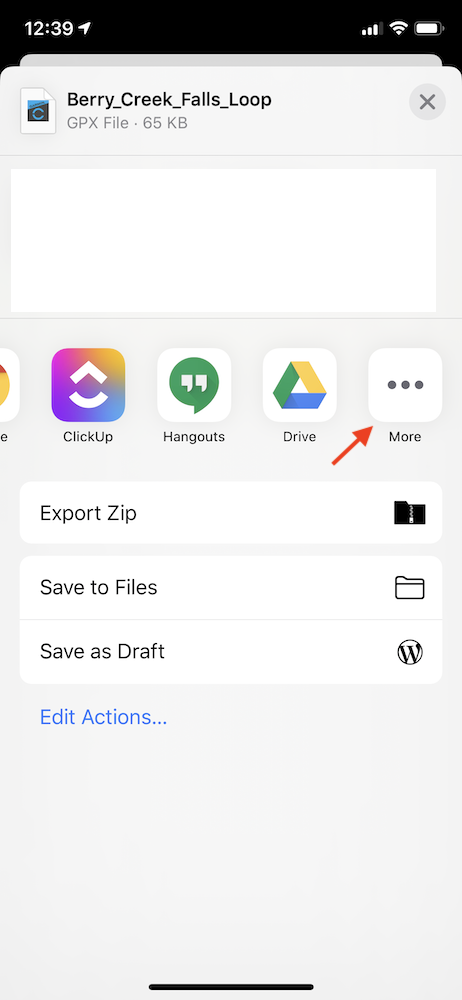
Select a route on the map, and open the route details view. From the three-dot top menu, select Export, then GPX.
On the following screen, select Garmin Connect. If you don’t see it in the list of apps, scroll it all the way to the end and select the More… option. The course should open in Garmin Connect, and you can skip to the section on syncing the device.

Importing a GPX file as a course in Garmin Connect
Uploading a route to your watch is a two-step process. First, you need to import it into Garmin Connect, then you need to sync it to your device.
Importing a route with the Garmin Connect website
I’ve found it easiest to import the routes using my computer.
Start by going to the Garmin Connect site and logging in.
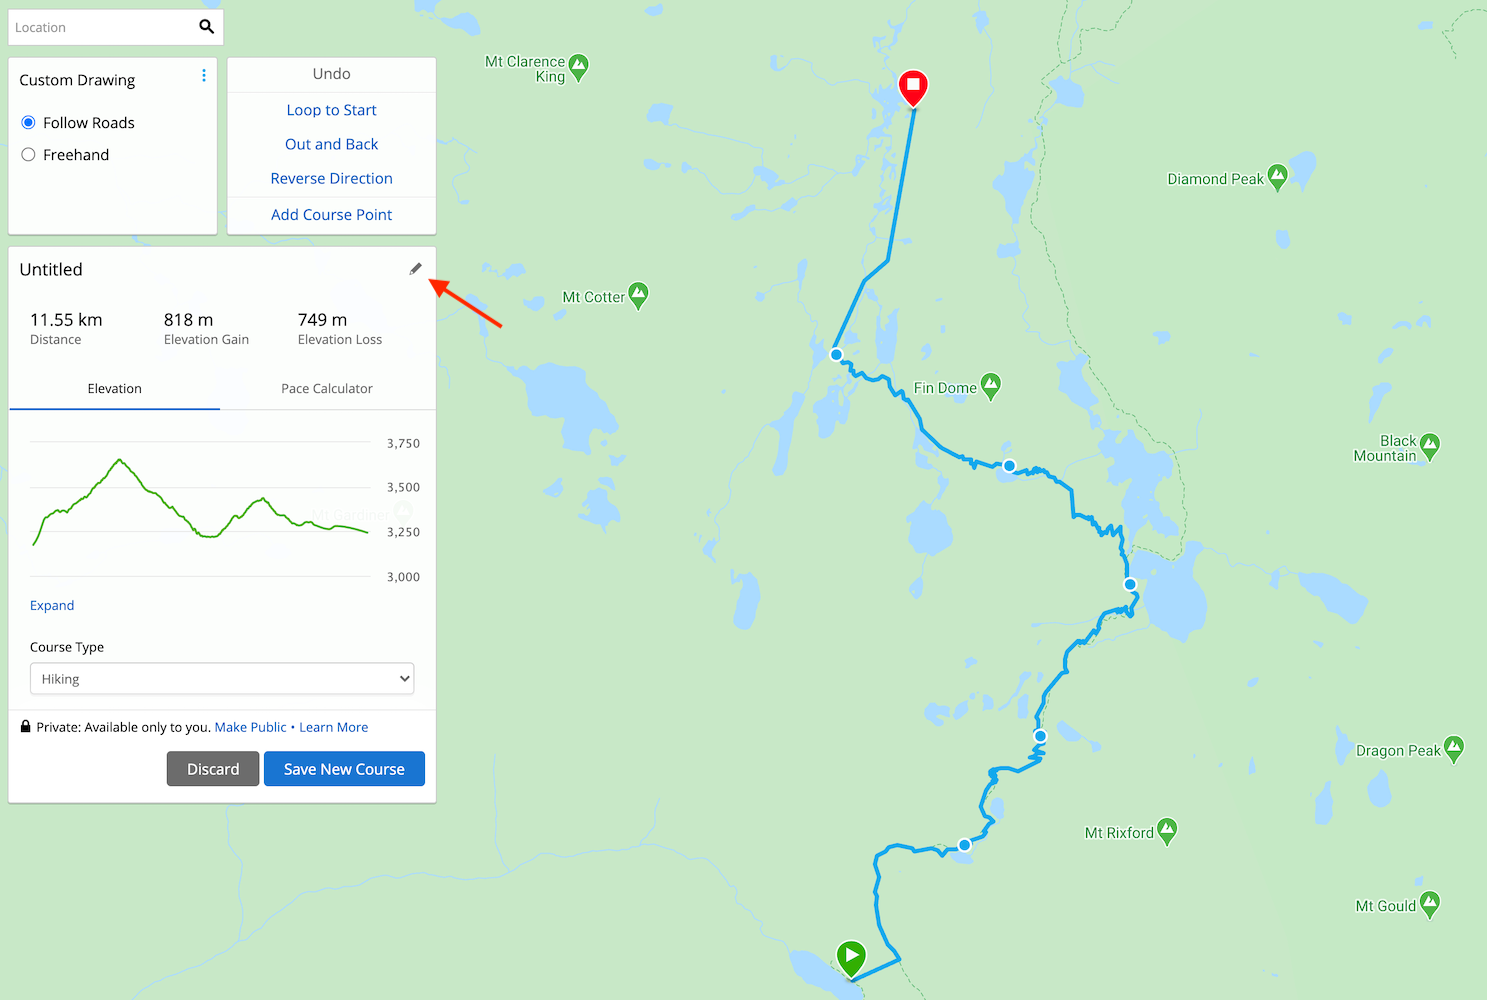
Open the course planning view from Training > Courses.
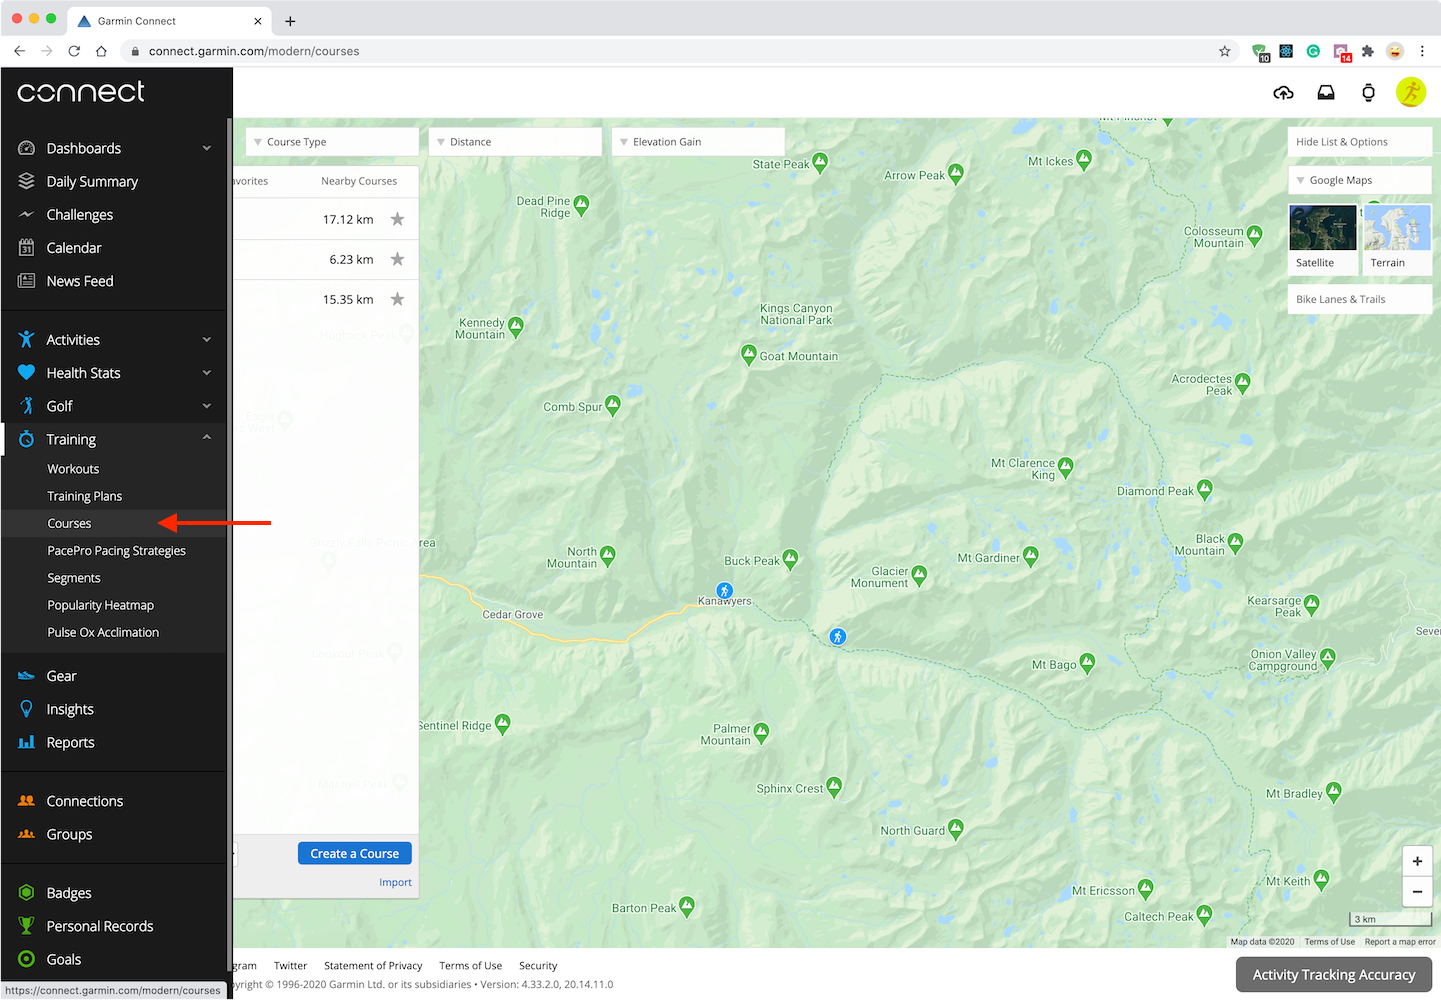
On the course planning view, start the import by clicking the small import link at the bottom.

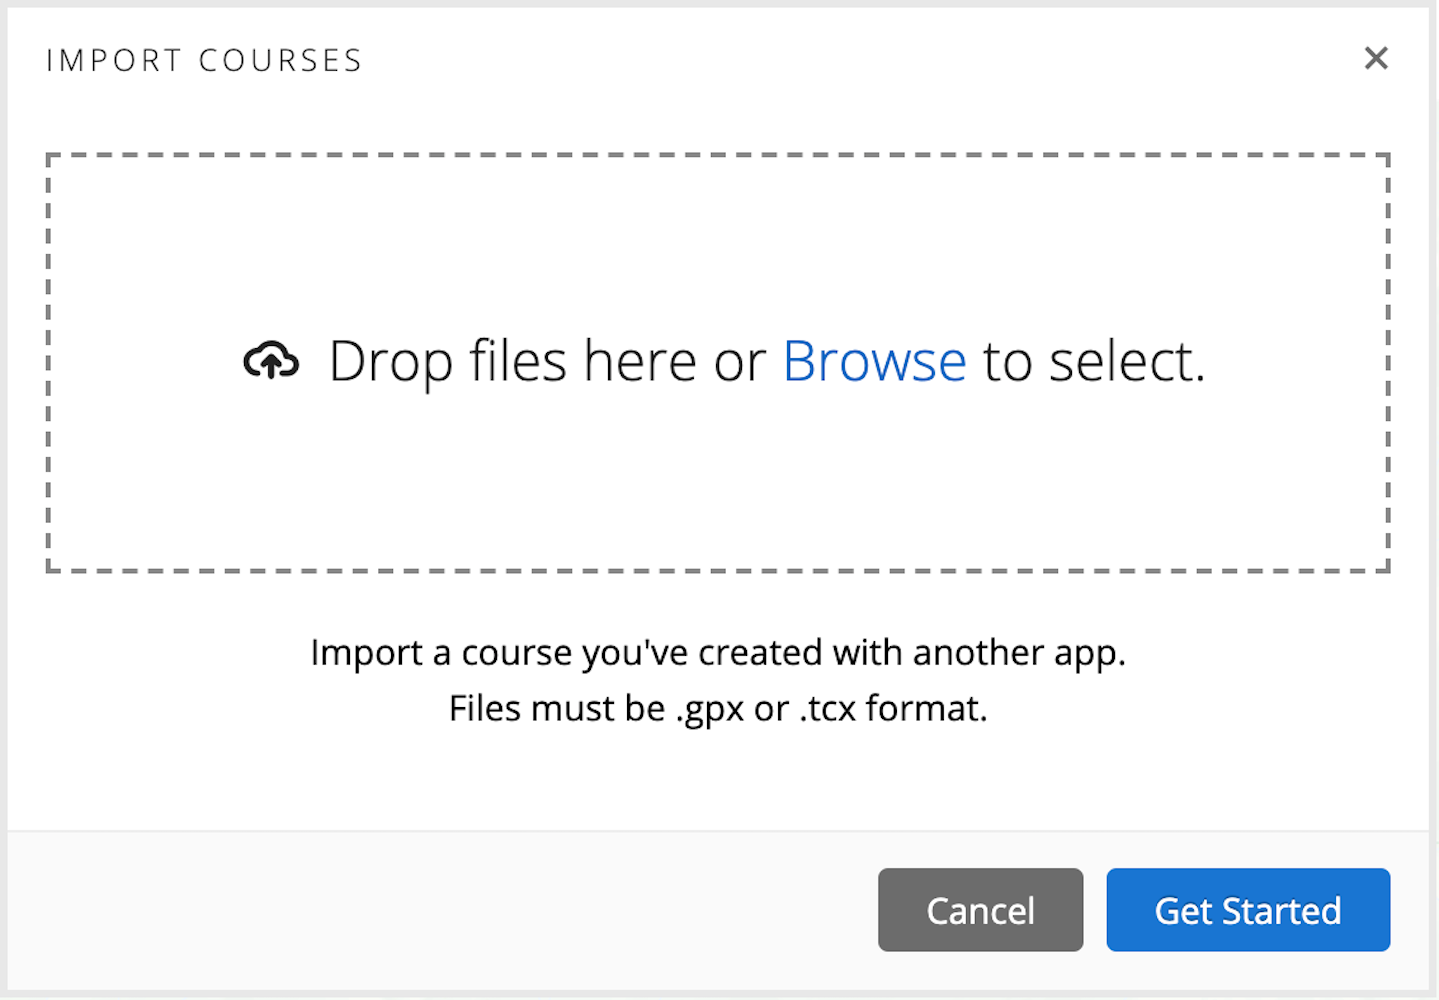
In the import dialog, select the GPX file you downloaded in the first step.
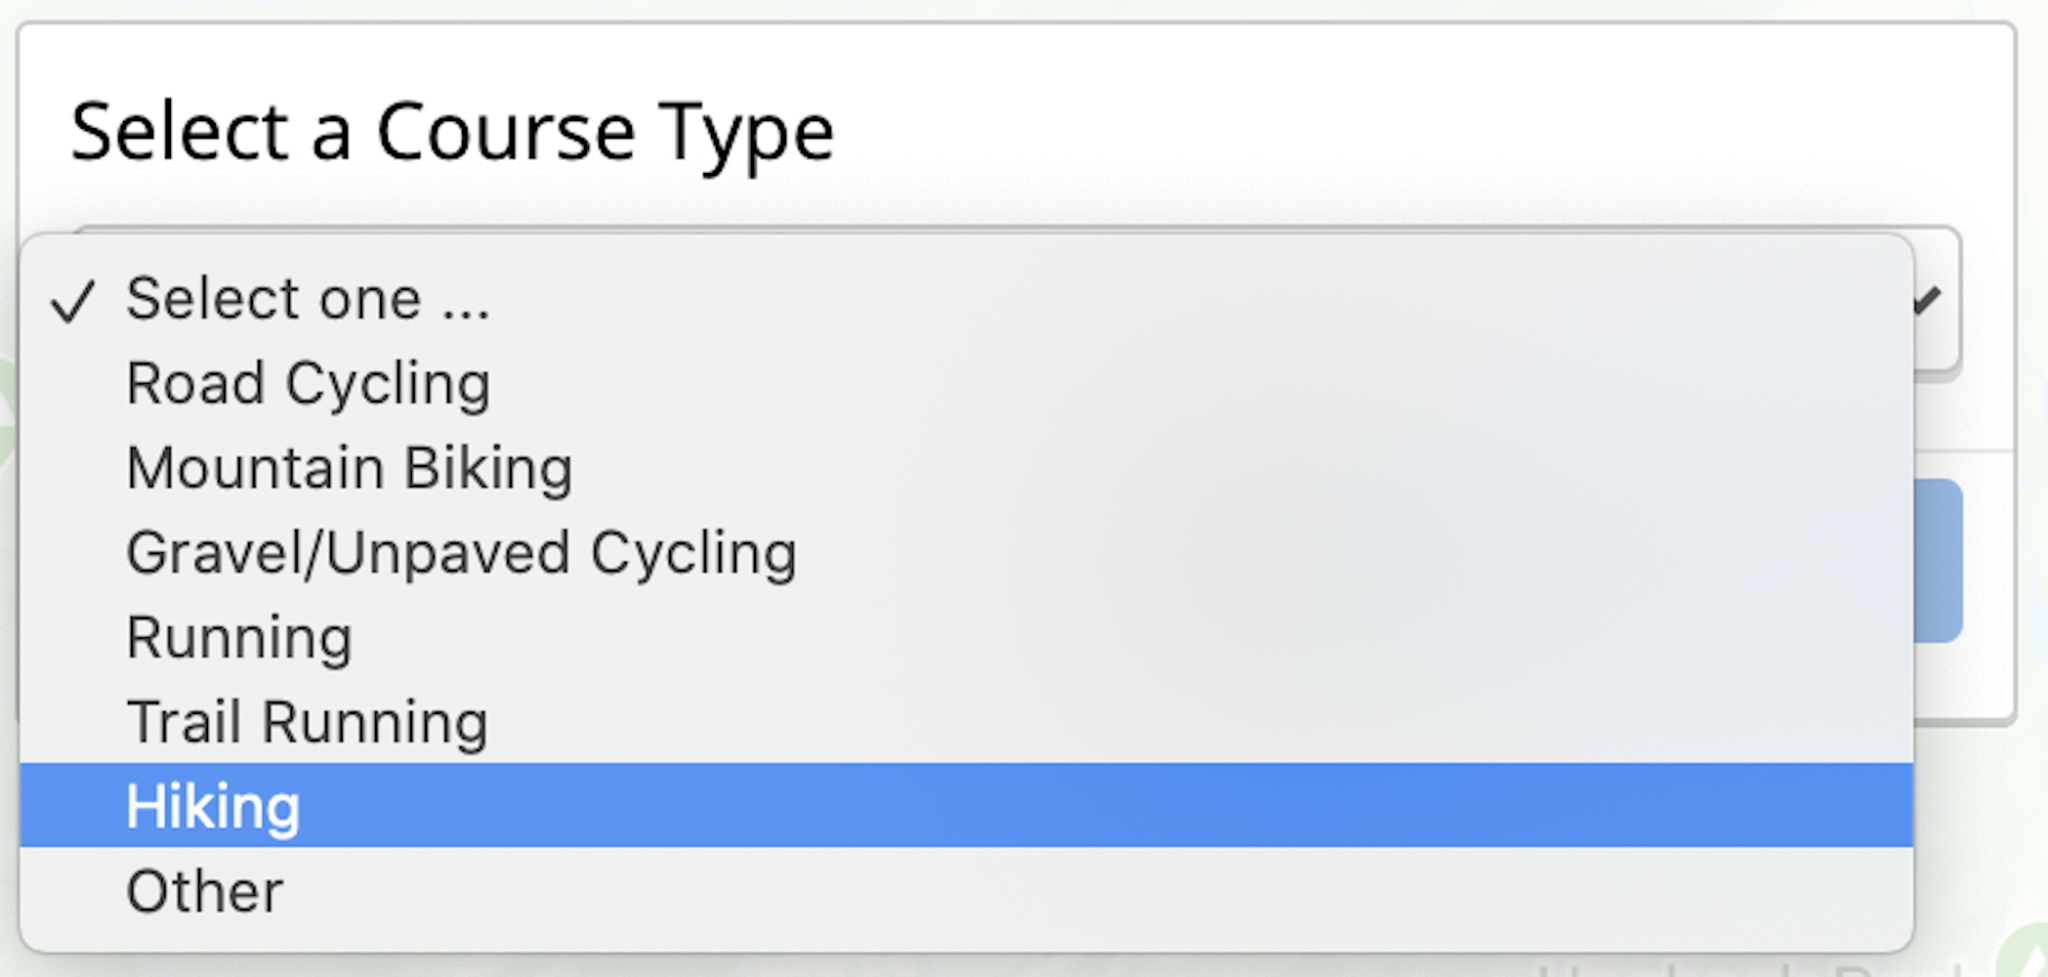
Select the course type.
Give the course a name and save it.
Importing a route on your phone
You can also import the GPX file on your phone. Start by either moving the GPX to a shared drive like iCloud or emailing it to yourself so you can access it from your phone.
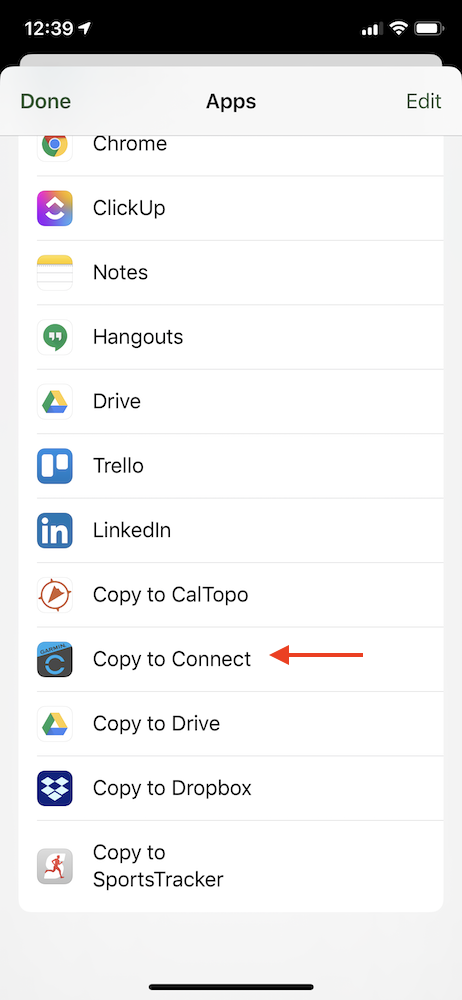
Open the file and use the share menu. Select Garmin Connect. If you don’t see Garmin Connect in the list of options, you may need to click the More… item to see all your apps.

Syncing the course to your device
Note: Syncing the tracks to your watch requires an internet connection, so be sure to do it before you hit the trail.
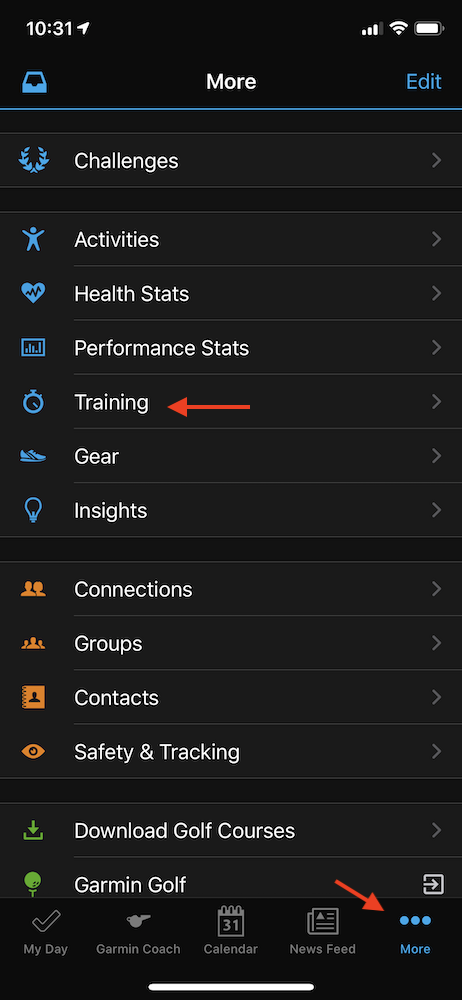
On your phone, open Garmin Connect and go to More > Training > Courses.
Select your course. Tap on the three-dot menu at the top and then Send to Device.
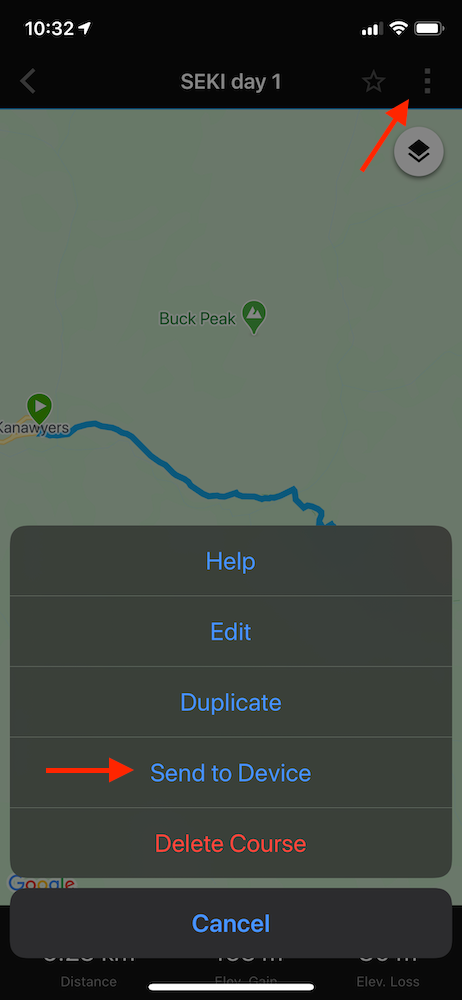
Sync your device.
Loading a course and starting navigation on Garmin Fenix
Almost there. Your course should now be on your watch. The final step is to start an activity and turn on course navigation.
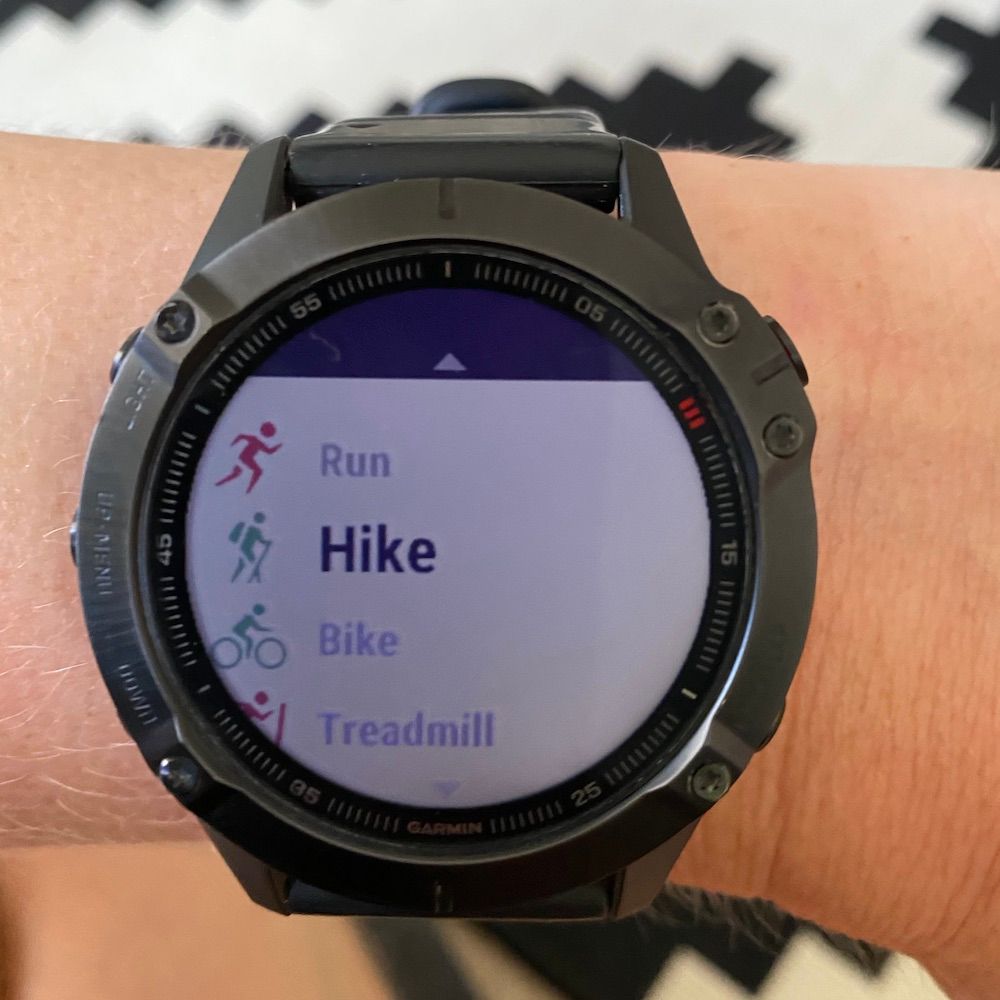
Press the activity button, and select the activity type, hiking in my case.
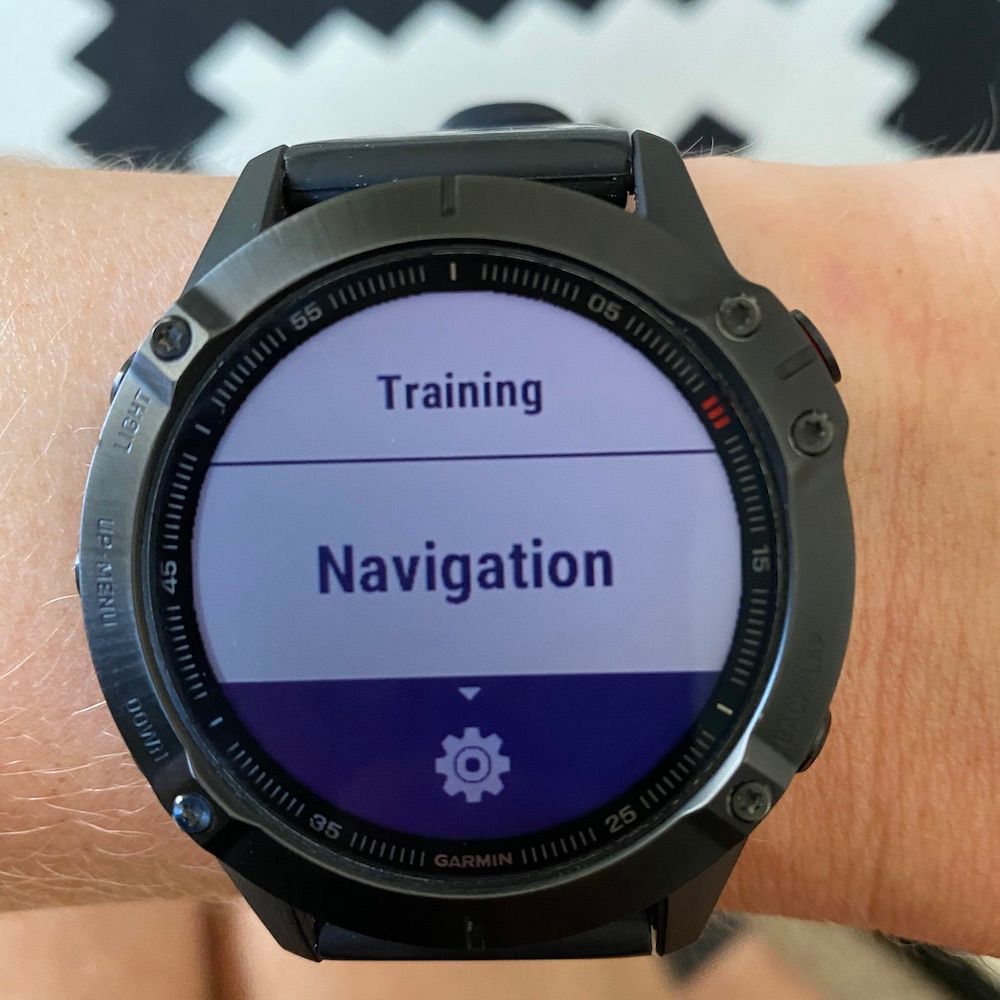
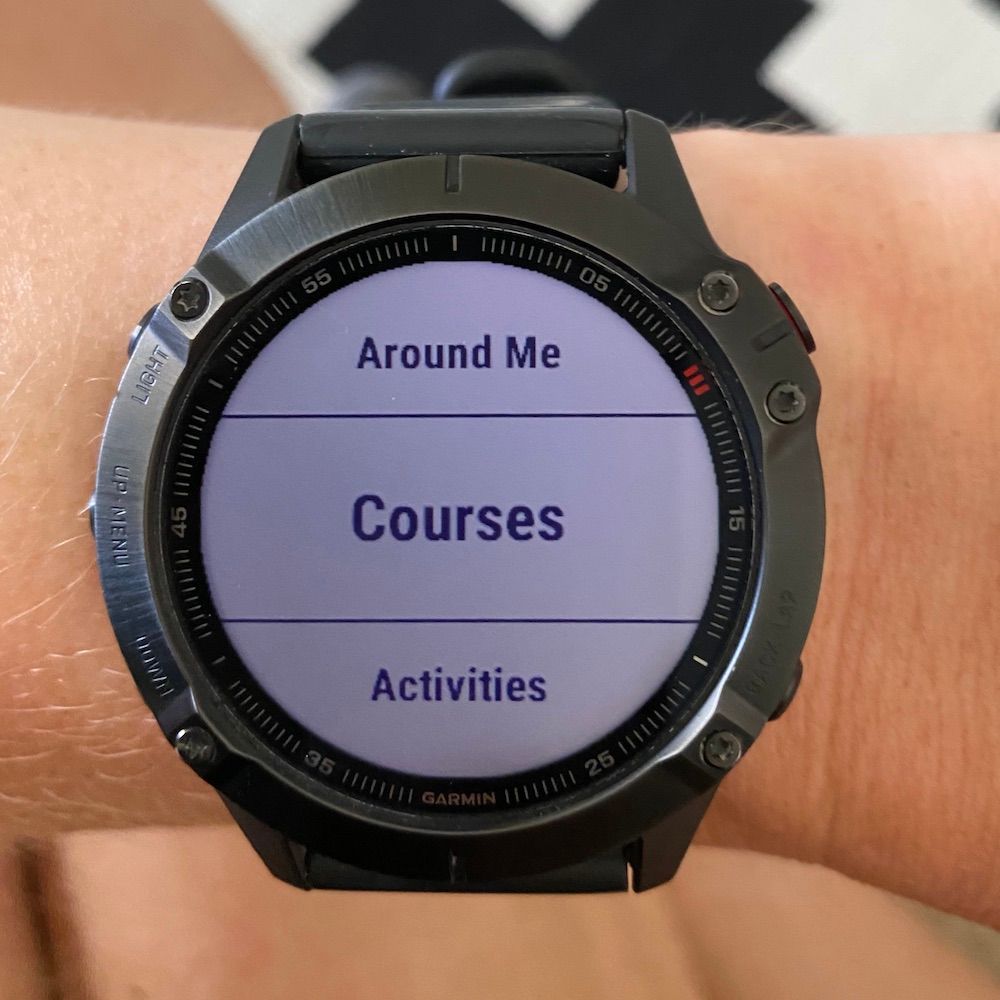
Hold down the up/menu button (middle one on the left side of the watch) until you see the settings menu. Scroll down to Navigation.
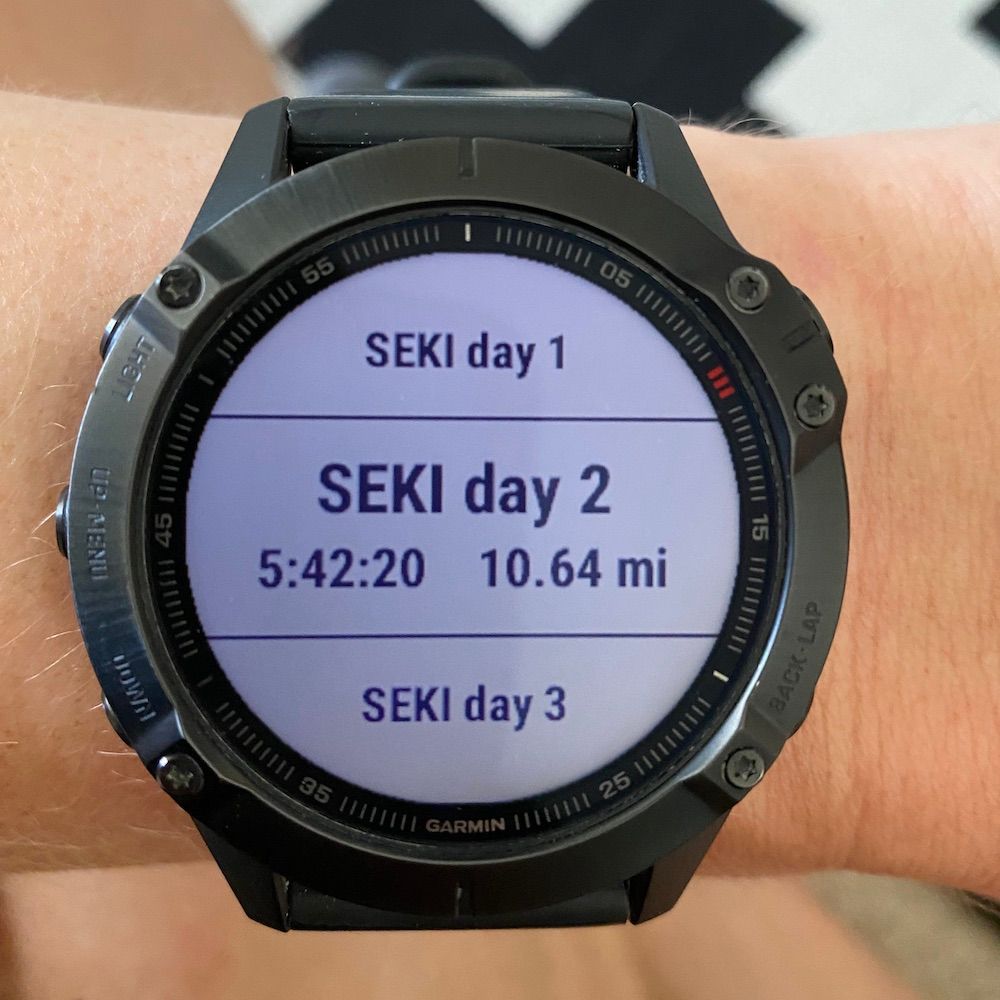
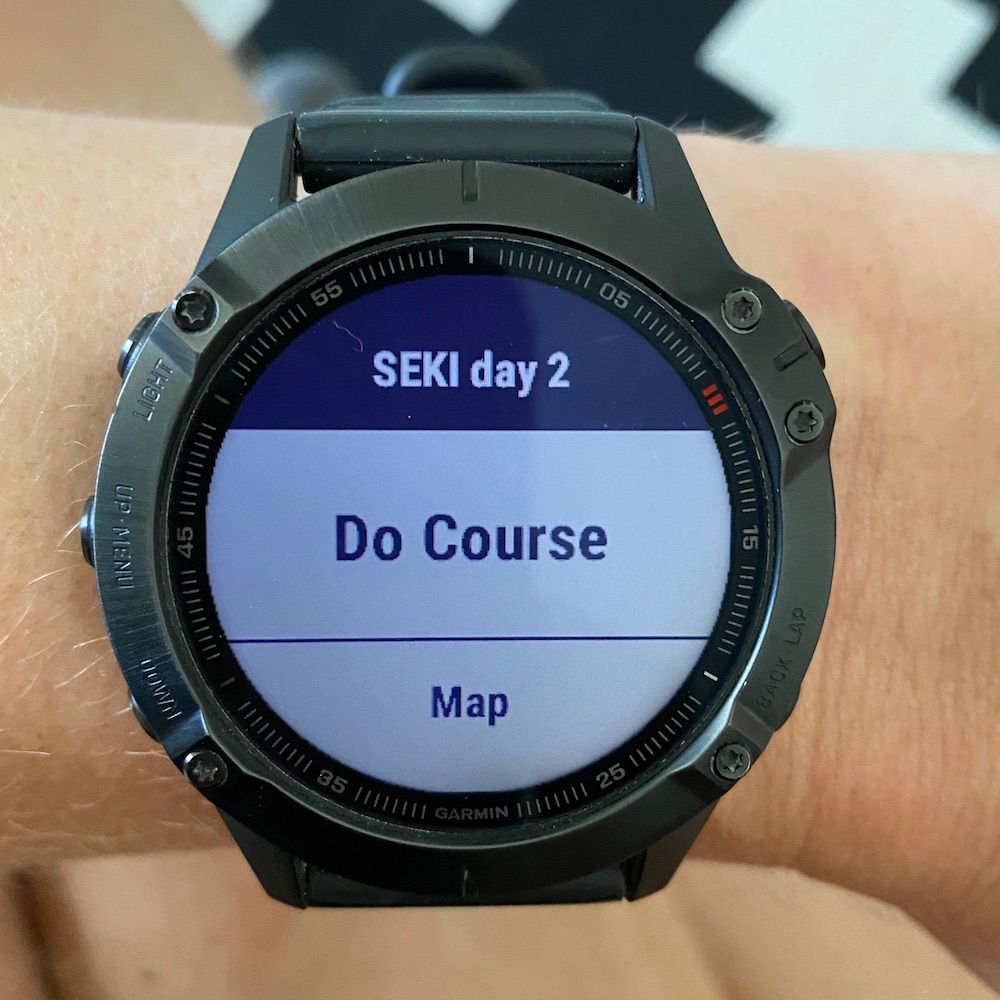
Scroll down to Courses, then select the course you want to do. Once it loads, select Do Course.
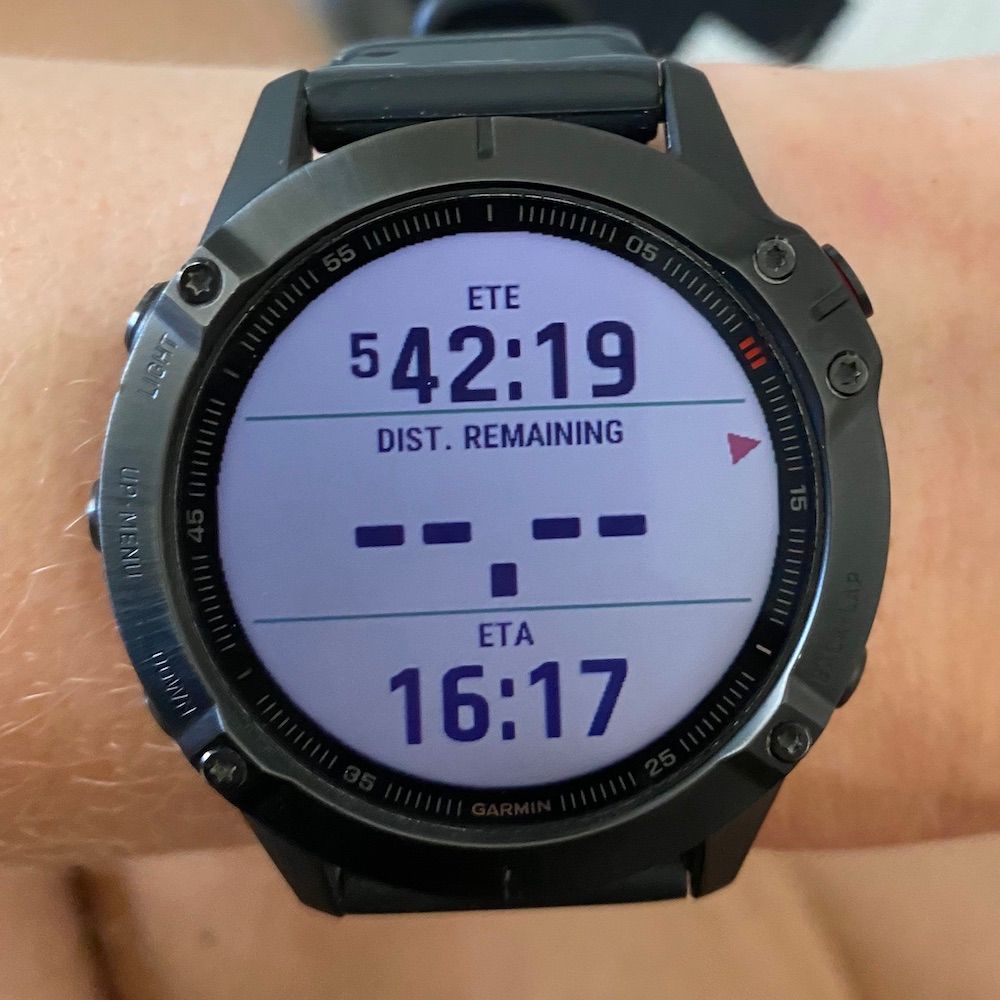
You’ll notice that you now have a few new screens in your activity: a map, an elevation profile view, and a time/distance remaining view. You’ll also see a red direction arrow overlaid on all screens.
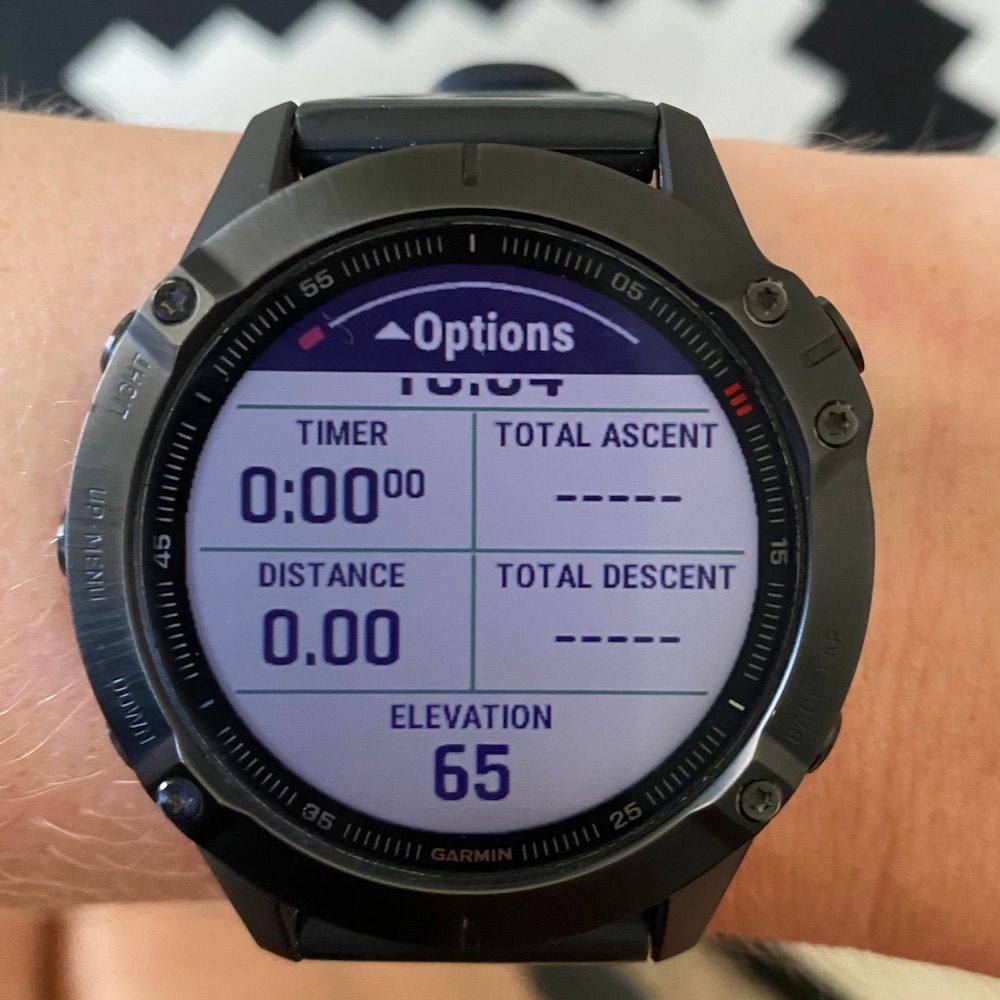
Start the activity as usual, and you’re ready to head out.
You can hold down the up/menu button during the activity to stop or configure the navigation. I recommend turning off the turn directions as they can get very annoying.
Hope this helped, have fun out there!